Les copier/coller – Swift
Contenu
- Afficher une trace
- Chaîne de caractères
- Chaîne de caractères avec interpolation
- Chaîne – concaténation
- Créer un tableau à partir d’un fichier de propriétés
- Charger une image par programmation
- Cacher la barre d’état (haut de l’écran)
- Lire la sélection d’un UISegmentedControl
- Libre
- Revenir à la scène précédente
- UITableView – délégation
- Afficher une UITableViewCell perso
- UICollectionView – délégation
- Créer une tableau d’images à partir de fichiers\(i).png et animer
- Créer une image à partir d’une URL – Solution bloquante et non bloquante
- Créer une tableau à partir d’un résultat JSON via le web
- Préparer un segue
- Exécuter une méthode après un délai
- Programmer un NSTimer
- Afficher un Alert
- Charger une scène (NIB, XIB, View) par programmation
- Animer une propriété
- Détecter une collision entre deux UIView
- Insérer une ‘View’ dans une ‘View’ parent, à la position parentViewCount – n
- Obtenir l’élément d’un dictionnaire
- Array – codé au dur
- Array – énumération rapide
- Dictionnary – codé au dur
- Dictionnary – énumération rapide
- Afficher heure actuelle avec format
- Créer un UIButton + event par programmation
- Capturer l’écran dans un UIImage
- Poster vers Facebook
- Poster vers twitter
- Masquer le clavier
- Programmer une délégation (UITextField)
- Ajouter la gestion des versions à un projet existant
- Stub AppDelegate.swift pour Xcode 6.4
- Git à partir du terminal (pour un projet en équipe)
- Variables globales
- Prendre une pause
1. Afficher une trace
println("Bonjour le monde...")
let pi = 3.141592
println("La valeur de pi est \(pi)")
let a=3, b=7
println("\(a) + \(b) = \(a+b)")
let unNom = "TIM le magnifique"
print("\(unNom) dit: Bonjour ");print("à tous!\n")
2. Chaîne de caractères
let uneChaineRO = "Je suis une chaine en lecture seule"
var uneChaineRW = "Je suis une chaine en lecture écriture"
var uneChaineOC:NSString = "Je suis une chaine Objective-C"
println("Il y a \(countElements(uneChaineRO)) caractères dans uneChaineRO")
println("Il y a \(String(uneChaineOC.length)) caractères dans uneChaineOC")
3. Chaîne de caractères avec interpolation
let perso = "Fantomas"
let persoForce = 17
var message = "Mon nom est \(perso) et j'ai \(persoForce) de force."
4. Chaîne – concaténation
var msg:String
let pi = 3.141592
msg = "Bienvenue " + "Au cours d'intro "
msg += "du langage Swift. PI = " + String(pi)
var res = ""
for car in msg {
    res += car
}
5. Créer un tableau avec un fichier
// Étant donné le fichier suivant:
<array>
  <dict>
    <key>nom</key>
    <string>Paul</string>
    <key>photo</key>
    <string>image01.png</string>
    <key>dette</key>
    <real>10.99</real>
  </dict>
...
</array>
// Créer un tableau avec méthode: Swift + Foundation
let pathFichierPlist = NSBundle.mainBundle().pathForResource("liste des amis", ofType: "plist")!
amis = NSArray(contentsOfFile: pathFichierPlist)
/// Méthode 100% swift (pas encore au point en version beta)
var tabloPerso:String[] = []
let path = NSBundle.mainBundle().pathForResource("personnages", ofType: "plist")
tabloPerso = NSArray(contentsOfFile: path) as String[]
println(tabloPerso)
tabloPerso.append("Tintin")
println(tabloPerso)
println(tabloPerso[tabloPerso.count - 1])
// Créer un tableau de 'Dictionary' à partir d'un fichier plist
// Définition du tableau
var amis:[Dictionary<String,String>]!
...
// Affectation à partir d'un fichier
amis = NSArray(contentsOfFile: NSBundle.mainBundle().pathForResource("liste des amis", ofType: "plist")!) as [Dictionary<String,String>]
6. Charger une image par programmation
let _image = UIImage(named:"paysage")
self.uneImage.image = image
// ou bien
self.imageView.image = UIImage(named:"image.png")
7. Cacher la barre d’état (haut de l’écran)
    override func prefersStatusBarHidden() -> Bool {
        return true
    }
8. Lire la sélection d’un UISegmentedControl
let selection =(sender as UISegmentedControl).selectedSegmentIndex
9. Libre
10. Revenir à la scène précédente
@IBAction func retourParent(sender: AnyObject) {
   self.dismissViewControllerAnimated(true, completion:nil);
}
11. UITableView – délégation
// ********************************************************************
func tableView(tableView: UITableView,  numberOfRowsInSection:NSInteger) -> Int
// ********************************************************************
{
   return tablo.count
} // numberOfRowsInSection
// ********************************************************************
func tableView(tableView: UITableView, cellForRowAtIndexPath indexPath: NSIndexPath) -> UITableViewCell!
// ********************************************************************
{
  //variable type is inferred
  var cell = tableView.dequeueReusableCellWithIdentifier("CELL") as? UITableViewCell
  if !cell {
     cell = UITableViewCell(style: UITableViewCellStyle.Value1, reuseIdentifier: "modeleCellule")
 } // !cell
  //we know that cell is not empty now so we use ! to force unwrapping
  cell!.textLabel.text = tablo[indexPath.row]
  cell!.detailTextLabel.text = "Personnage de Tintin"
  cell!.imageView.image = UIImage(named:"lezard")
  return cell
} // cellForRowAtIndexPath
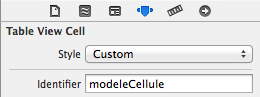
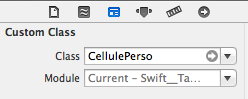
12. Afficher une UITableViewCell perso
// ********************************************************************
func tableView(tableView: UITableView, cellForRowAtIndexPath indexPath: NSIndexPath) -> UITableViewCell!
// ********************************************************************
{
  //Le type de la variable est inféré.
  var cell = tableView.dequeueReusableCellWithIdentifier("modeleCellule") as? CellulePerso
  if cell !=nil {  // Si nil alors
      cell = CellulePerso(style: UITableViewCellStyle.Value1, reuseIdentifier: "modeleCellule")
  } // !cell
  //À ce point ci, cell n'est pas nil. Il faut utiliser ! pour la déballer
  cell!.c1.text = tablo[indexPath.row]
  cell!.c2.text = "Personnage de Tintin"
  cell!.uneImage.image = UIImage(named:"lezard")
  return cell
} // cellForRowAtIndexPath

13. UICollectionView – délégation
// ********************************************************************
func collectionView(collectionView: UICollectionView?, numberOfItemsInSection section: Int) -> Int
// ********************************************************************
{
   return tablo.count
}
// ********************************************************************
func collectionView(collectionView: UICollectionView?, cellForItemAtIndexPath indexPath: NSIndexPath?) -> UICollectionViewCell?
// ********************************************************************
{
  let cell = collectionView?.dequeueReusableCellWithReuseIdentifier("uneCellule", forIndexPath: indexPath) as CellulePersoCV
  // Configuration de la cellule
  cell.c1.text = String(itemCourant)
  cell.c2.text = String(indexPath!.row)
  cell.c3.text = tablo[indexPath!.row]
  return cell
}
14. Créer une tableau d’images à partir de fichiers000(i).png et animer
let DUREE_ANIMATION = 1 as NSTimeInterval
let ANIMATION_NB_FOIS = 3
var tabloImages = UIImage[]()
for i in 1...28 {
  tabloImages.append(UIImage(named:"warrior_walk_\(i).png"))
}
// Renseigner l'image à partir du tableau et démarrer l'animation
uneImageAnimee.animationImages = tabloImages
uneImageAnimee.animationRepeatCount = ANIMATION_NB_FOIS
uneImageAnimee.animationDuration = DUREE_ANIMATION
uneImageAnimee.startAnimating()
15. Créer une image à partir d’une URL
// Créer un UIImage à partir du WEB
// Solution bloquante
// ** Solution 1: Forme courte
let uneURL:NSURL = NSURL(string:"http://hmp.me/dtm")
uneImageURL.image = UIImage(data:NSData(contentsOfURL:uneURL));
// ** Solution 2: Forme longue avec validation
let uneURL:NSURL = NSURL(string:"http://hmp.me/dtm")
var err:NSError?
let htmlData = NSData.dataWithContentsOfURL(uneURL, options: NSDataReadingOptions.DataReadingMappedIfSafe, error: &err)
uneImageURL.image = UIImage(data:htmlData)
// ** Solution 3 - non bloquante
let uneURL:NSURL = NSURL(string:"http://hmp.me/dtm")
let request:NSURLRequest = NSURLRequest(URL:uneURL)
let queue:NSOperationQueue = NSOperationQueue()
NSURLConnection.sendAsynchronousRequest(request, queue: queue, completionHandler:{ (response: NSURLResponse!, data: NSData!, error: NSError!) -> Void in
           self.uneImageURL.image = UIImage(data:data)
       })
16. Créer une tableau à partir d’un résultat JSON via le web
// Obtenir la météo de Montréal via l'API Yahoo
let urlString = "http://query.yahooapis.com/v1/public/yql?q=select%20item%20from%20weather.forecast%20where%20location%3D%22CAXX0301%22&format=json"
let request:NSURLRequest = NSURLRequest(URL:NSURL(string: urlString))
let queue:NSOperationQueue = NSOperationQueue()
NSURLConnection.sendAsynchronousRequest(request, queue: queue, completionHandler:{ (response: NSURLResponse!, data: NSData!, error: NSError!) -> Void in
  var err: NSError?
  var jsonResult = NSJSONSerialization.JSONObjectWithData(data, options: NSJSONReadingOptions.MutableContainers, error: &err) as NSDictionary
  if(err?) {
     // Si erreur de conversion JSON alors afficher l'erreur
     println("JSON Error (err!.localizedDescription)")
  }
  println("===> résultat JSON:\n\n \(jsonResult)")
})
17. Préparer un segue
// Lancée automatiquement avant une transition 'segue'
// -------------------------------------------------------------
// Exemple pour une sélection à partir d'un UITableView
// ********************************************************************
override func prepareForSegue(segue: UIStoryboardSegue!, sender: AnyObject!)
// ********************************************************************
{
  // Pointer sur la scène de destination
  let sceneDestination = segue.destinationViewController as ClasseSceneDestination
  // sender -> pointe sur la cellule sélectionnée
  let selectionCourante = self.unTableView.indexPathForCell(sender as UITableViewCell).row;
  // Envoyer les informations à la scène de destination
  sceneDestination.tablo = tablo
  sceneDestination.itemCourant = selectionCourante
}  // prepareForSegue
// -------------------------------------------------------------
// Exemple pour une sélection à partir d'un UICollectionView
var _selection = 0
// ********************************************************************
override func prepareForSegue(segue: UIStoryboardSegue!, sender: AnyObject!)
// ********************************************************************
{
  // Pointer sur la scène de destination
  let sceneDestination = segue.destinationViewController as Scene03
  // indice cellule sélectionnée via shouldSelectItemAtIndexPath
  let selectionCourante =  _selection;
  // Envoyer les informations de la sélection courante
  sceneDestination.title = tablo[selectionCourante]
}
// ********************************************************************
func collectionView(collectionView: UICollectionView?, shouldSelectItemAtIndexPath indexPath: NSIndexPath?) -> Bool
// ********************************************************************
{
  _selection = indexPath!.row
return true
}
18. Exécuter une méthode après un délai
dispatch_after(temps, dispatch_get_main_queue(),
           {
            self.tournerLaPage("page2")
            }
)
// ****************************************************
func tournerLaPage(scene:String) {
        println("Tourner la page à \(scene)")
        performSegueWithIdentifier(scene, sender: self)
}
19. Programmer un NSTimer
var unTimer:NSTimer!
...
unTimer = NSTimer.scheduledTimerWithTimeInterval(2, target: self, selector: Selector("uneFonction:"), userInfo: nil, repeats: true)
...
// *************************************
func uneFonction(timer: NSTimer) -> Void
{
   println("Fonction exécutée par le timer...")
}
20. Afficher un Alert
// Nouvelle méthode proposée avec Swift
let alert = UIAlertController(title: "Title", message: "Message", preferredStyle: UIAlertControllerStyle.Alert)
alert.addAction(UIAlertAction(title: "Button", style: UIAlertActionStyle.Default, handler: nil))
self.presentViewController(alert, animated: true, completion: nil)
// Ancien méthode inspirée d'Objective-C
var alert2 = UIAlertView()
alert2.title = "Un titre"
alert2.message = "Un message"
alert2.addButtonWithTitle("ok")
alert2.show()
21. Charger un NIB par programmation
var uneView = UINib(nibName: "Magazine01", bundle: nil).instantiateWithOwner(nil, options: nil)[0] as UIView
// Pour ajouter à la scène courante:
view.addSubview(uneView);
22. Animer une propriété
animerImage(self.uneImage)
// ****************************************
func animerObjet (objet:UIView){
   UIView.animateWithDuration(
             2,
             animations: { objet.alpha = 0.5 },
             completion: { finished in
                           objet.hidden = false }
   ) // UIView
   UIView.animateWithDuration(
             1,
             delay:1,
             options:UIViewAnimationOptions.CurveEaseIn,
             animations: { objet.center.x = objet.center.x + 50},
             completion: { _ in
                           // Code à exécuter lorsque animation terminée
                           // Par exemple, une autre animation.
                         }
    ) // UIView
}  // animerImage
23. Détecter une collision entre deux UIView
CGRect personnage = [[lePersonnage.layer presentationLayer]frame];
CGRect sousZone = CGRectInset(personnage, personnage.size.width/2,personnage.size.height/2 );
if (CGRectIntersectsRect(sousZone, unObjet.frame))
{
  NSLog(@"Il y a eu collision entre le personnage et %@", unObjet.class);
}
24. Insérer une subView à la position parentViewCount – n
view.insertSubview(uneView, atIndex: view.subviews.count - 1)
25. Obtenir l’élément d’un dictionnaire
if let tt = jsonResult["query"]!["results"]!["channel"]!["item"]!["condition"]!["temp"]! as String!
{
   println("Température actuelle pour Montréal: \(tt)")
}
26. NSArray – créer au dur
var tablo = ["Bob", "Binne", "Tintin", "Milou", "Hadock", "Castafiore", "Allan", "Tounesol", "Alcazar", "Barnabé", "Baxter", "Bill","Bohlwinkel", "Cipaçalouvishni"]
// Pour ajouter un élément
tablo.append("Objectif Lune")
// Ou
tablo+="encore"
// Pour un NSArray
var tabloNSArray:NSMutableArray = ["Tintin", "et", "Milou"]
tabloNSArray.addObject("Coke en stock")
27. NSArray – énumération rapide
// Énumération des éléments d'un tableau
for item in tablo) {
    println("Item: \(item)")
}
// Énumération des éléments d'un tableau avec indice
for (index, value) in enumerate(tablo) {
    println("Item \(index + 1): \(value)")
}
28. NSDictionnary – créer au dur
var dictio = ["Nom":"Paul", "Age":22, "Titre":"Intégrateur", "Expérience":2]
// Ajouter un élément
dictio["Compagnie"] = "TIM"
var dictio2:NSDictionary = ["Nom":"Paul", "Age":22, "Titre":"Intégrateur", "Expérience":2]
29. NSDictionnary – énumération rapide
//Pour parcourir les éléments d'un dictionnaire
for(NSString * key in unDictionnaire){
   NSLog(@"clé: %@, contenu: %@", key, unDictionnaire[key]);
}
30. Afficher heure actuelle avec format
// ******************************************
func obtenirHeure() -> String {
  let unFormateurDeDate = NSDateFormatter()
  unFormateurDeDate.dateFormat = "'Nous sommes 'EEEE' et il est 'hh:mm:ss";
  unFormateurDeDate.locale = NSLocale(localeIdentifier: "en_US_POSIX")
  return unFormateurDeDate.stringFromDate(NSDate())
}  // obtenirHeure
println(obtenirHeure())
// Ou en ajoutant une nouvelle méthode à la Classe NSDate
extension NSDate
{
    convenience
      init(dateString:String) {
      let dateStringFormatter = NSDateFormatter()
      dateStringFormatter.dateFormat = "yyyy-MM-dd"
      dateStringFormatter.locale = NSLocale(localeIdentifier: "en_US_POSIX")
      let d = dateStringFormatter.dateFromString(dateString)
      self.init(timeInterval:0, sinceDate:d)
    }
 }
31. Créer un UIButton + event par programmation
// ********************************************************
func creerBouton(texte:String, action:String) -> UIButton {
  let unBouton   = UIButton.buttonWithType(UIButtonType.System) as UIButton
  unBouton.frame = CGRectMake(100, 100, 100, 50)
  unBouton.backgroundColor = UIColor(red: 45/255, green: 23/255, blue: 111/255, alpha: 1.0)
  unBouton.setTitle(texte, forState: UIControlState.Normal)
  unBouton.setTitleColor(UIColor.whiteColor(), forState: UIControlState.Normal)
  unBouton.addTarget(self, action: Selector(action), forControlEvents: UIControlEvents.TouchUpInside)
  return unBouton
} // creerBouton
// ********************************************************
func boutonAction(sender:UIButton!)
{
  println("Action du bouton maison!")
}
// Utilisation
self.view.addSubview(creerBouton("Victoire!", action: "boutonAction:"))
32. Copier l’écran dans un UIImage
// import QuartzCore
var imageFinale = UIImage()
func sauvegarderEcran(){
  // Description : méthode servant à capturer l’écran et au besoin,
  // en faire une sauvegarde dans l’album photos.
  // 1 - Préparer un contexte de dessin à partir de la taille de la scène
  UIGraphicsBeginImageContext(self.view.bounds.size);
  // 2 – Dessiner à partir du claque par défaut de la scène
  self.view.layer.renderInContext(UIGraphicsGetCurrentContext());
  // 3 – Stocker le résultat dans notre objet local
  imageFinale = UIGraphicsGetImageFromCurrentImageContext();
  // 5 – Fermer le contexte de dessin
  UIGraphicsEndImageContext();
  // 6 – Facultatif - Stocker une copie de la capture d’écran dans l’album photos
  UIImageWriteToSavedPhotosAlbum(imageFinale, nil, nil, nil );
} // sauvegarderEcran
33. Poster vers Facebook
import Social
func posterSurFacebook() {
  // Les étapes pour utiliser ‘facebook’
  // 1 - Tester si le service et les informations de connexion sont dispo
  if SLComposeViewController.isAvailableForServiceType(SLServiceTypeFacebook)
  {
    // 2 - Créer un feuille pour le 'post'
    let controleur = SLComposeViewController (forServiceType: SLServiceTypeFacebook)
    // 3 - Composer le message
    controleur.setInitialText("Test avec Swift et Xcode");
    // 4 - Ajouter une image - facultatif
    controleur.addImage(imageFinale);
    // 5 - Ajouter un lien - facultatif
    controleur.addURL(NSURL(fileURLWithPath:"/cours/xcode/"))
    // 6 - Présenter la fenêtre de confirmation à l'utilisateur
    self.presentViewController(controleur, animated: true, completion: nil);
    } // if Facebook
} // posterSurFacebook
34. Poster vers twitter
import Social
func posterSurTwitter() {
  // Les étapes pour utiliser ‘twitter’
  // 1 - Tester si le service et les informations de connexion sont dispo
  if SLComposeViewController.isAvailableForServiceType(SLServiceTypeTwitter)
  {
    // 2 - Créer un feuille pour le 'post'
    let tweetSheet = SLComposeViewController (forServiceType: SLServiceTypeTwitter)
    // 3 - Composer le message
    tweetSheet.setInitialText("TIM.CSTJ - Production sur support 2015. Intro à Swift #CSTJ");
    // 4 - Ajouter une image - facultatif
    tweetSheet.addImage(imageFinale);
    // 5 - Ajouter un lien - facultatif
    // [tweetSheet addURL:[NSURL URLWithString:@""]];
    // 6 - Présenter la fenêtre de confirmation à l'utilisateur
    self.presentViewController(tweetSheet, animated: true, completion: nil);
  } // if twitter disponible ...
} // posterSurTwitter
35. Masquer le clavier
// Note: il faut aussi renseigner le 'delegate' de l'objet
func textFieldShouldReturn(textField:UITextField!) -> Bool{
  textField.resignFirstResponder()
  return true
}
36. Programmer une délégation (UITextField)
import UIKit
class ViewController: UIViewController, UITextFieldDelegate  {
    @IBOutlet weak var unChamp: UITextField!
    var nbRetours = 0
    override func viewDidLoad() {
        super.viewDidLoad()
        unChamp.delegate = self
    }  // viewDidLoad
    /// Programmer une délégation
    func textFieldShouldReturn(textField: UITextField!) -> Bool  {
        println("La touche 'Return' a été appuyée \(++nbRetours) fois.")
        return true
    } //textFieldShouldReturn
}  // ViewController
37. Ajouter la gestion des versions à un projet existant
# À partir de l'app 'terminal', naviguer vers le dossier parent du projet et saisir les commandes suivantes:
git init
git add .
git commit -m "Premier 'Commit'"
38. Stub AppDelegate.swift pour Xcode 6.4
//  AppDelegate.swift
//  stub
import UIKit
@UIApplicationMain
class AppDelegate: UIResponder, UIApplicationDelegate {
    var window: UIWindow?
    func application(application: UIApplication, didFinishLaunchingWithOptions launchOptions: [NSObject: AnyObject]?) -> Bool {
        return true
    } // didFinishLaunchingWithOptions
    func applicationWillResignActive(application: UIApplication)    {  }
    func applicationDidEnterBackground(application: UIApplication)  {  }
    func applicationWillEnterForeground(application: UIApplication) {  }
    func applicationDidBecomeActive(application: UIApplication)     {  }
    func applicationWillTerminate(application: UIApplication)       {  }
} // class AppDelegate:
39. Git à partir du terminal (pour le travail d’équipe)
Étapes:
1 - Creer un 'repo' sur github avec un Readme et ignore 'swift'
2 - Creer le projet sous Xcode avec l'option 'git'
3 - Avec terminal, cd vers le dossier du projet taper:
  git init
  git remote add origin https://github.com/votre compte/le projet.git
  git pull origin master
  git add *
  git commit -m "commit de depart"
4 - dand Xcode, faire un push
// Pour le deuxieme membre de l'équipe faire:
Source control -> check out
// gestion des conflits
http://roadfiresoftware.com/2015/09/automatically-resolving-git-merge-conflicts-in-xcodes-project-pbxproj/
40. Variables globales
Ajouter une classe ou une structure au projet qui contient des propriétés statiques:
// Fichier Static.swift
struct Static {
    static var i = 99
}
///  Exemple d'utilisation:
override func viewDidAppear(animated: Bool) {
    Static.i = 123
    println(Static.i)
}